Boosting my Boots

Wednesday, February 11, 2015

One day last week, I was getting dressed and thought the perfect addition to my outfit were a pair of brown boots which I haven't worn much this winter.  I pulled the boots out of my closet and they looks so dry and cracked. They looked like my dry skin on a cold winter day when I forget to lotion.
Dried out boots
Since I typically wear sneakers to and from work, I threw the boots in my tote bag to bring to work thinking maybe I could find a fix.  A block from my office, I stopped into a Shoe Repair store hole in the wall.  I approached the counter containing a variety of bottles of shoe stuff and asked for "leather conditioner," partially thinking that I was making that term up.  I'm probably the last to know that this stuff exists.  The guy told me they had a few, and I asked for the one that he recommended.  For $10 I left with a 8oz bottle of Lexol Leather Conditioner.

When I got to work, I spent five minutes in the bathroom, following the directions on the bottle.  Basically, rubbed the lotion all over the boots.  Just like putting good lotion on your hands, after about three minutes the lotion seeps into the skin and leaves no yucky residue.  Also, the conditioner is white, so I didn't have to worry about it rubbing off on my beige pants.  In case you can't tell how much better the boots look after this treatment, from the picture on the left, the picture on the right shows one boot with, and the other without the conditioner.  Amazing!  And a week later, they are still looking good.


  I will Shariously be using this on all my dried out leather stuff!

Seashell Memory Box (DIY Tuesday)

Tuesday, February 10, 2015

Lately, since I now have the space, I've been feeling crafty.  A few weeks ago, we were in Bed Bath and Beyond looking for some items for the house, when I came across this decorative wall hanging:


I thought, that would look nice in our beach-themed yellow guest room.  Then thought, that it was probably about $30 and looked like something I could make myself.  I have a huge collection of seashells and paints, all I needed was a frame.  While in AC Moore I found a set of three white memory box frames on sale for $10.

Supplies:

Paint
Rust-oleum spray paint
9 Seashells
Memory box frame
Cardboard (cut to frame size)*

Steps:

  1. Choose your 9 seashells - I chose to use a variety of shapes, textures and sizes, with the center shell being the "coolest" looking one.  Use a spray paint to coat them.  Lighter colors will help retain the texture.
  2. Mix a paint color to use for background.  I decided on turquoise to be reminiscent of the ocean as well as to match our yellow wall color.  Paint your backdrop.
  3. Use hot glue to glue the shells to the background.
  4. Place in frame!
Here is my final product:

The best part of this endeavor, when I was done, I looked the item up on BBB's website, and found out the retail price is $59.99!  This basically cost me $3.33, the price of the frame, since I had all the other materials.

I Shariously love being crafty and look forward to sharing more of my creations with you.

*I bought some canvas to paint on for the background, but the middle seashell was too deep and I had to repaint the background on cardboard in order to make it fit.


Quantum of the Seas! (Travel Tuesday)

Tuesday, December 23, 2014

About a year and half ago, Adam saw the offer to book an inaugural "sampler" cruise to nowhere on Royal Caribbean's brand new ship.  A few weeks ago, our long awaited getaway finally arrived.  The purpose of the 3-day cruise was simply to enjoy the ship.  There was no destination, hence the cruise to nowhere.  The ship left from Cape Liberty in Bayonne, NJ and traveled out in the ocean down to offshore of Cape Hatteras, and then turned around.  Here are some of our highlights:


A view of NYC from the North Star "Take yourself to new heights with the jewel-shaped capsule that gently ascends over 300 feet above sea level. Breathtaking 360° views of the sea and our destinations make the North Star one of the most anticipated features on this ship."


One of my highlights was the trapeze!  I was even able to do some tricks - like hang upside down. 


The skies were clear, but the first two days the weather was in the 30s and 40s, so we didn't spend too much time outside with this fuchsia polar bear Felicia; but there was plenty to do indoors!   The last day, it was in the mid-50s so I did get to climb the rock wall you see on the left.

Another cruise highlight was the Ripcord by iFly skydiving simulator.  You go into a vertical wind tunnel that teaches you how to skydive.  Unfortunately we weren't able to bring any cameras, so we only have these before pictures of being decked out in skydive gear.


We had a nice balcony, which due to the cold weather, we didn't spend much time on.  The entire trip we had very serene views of the ocean.


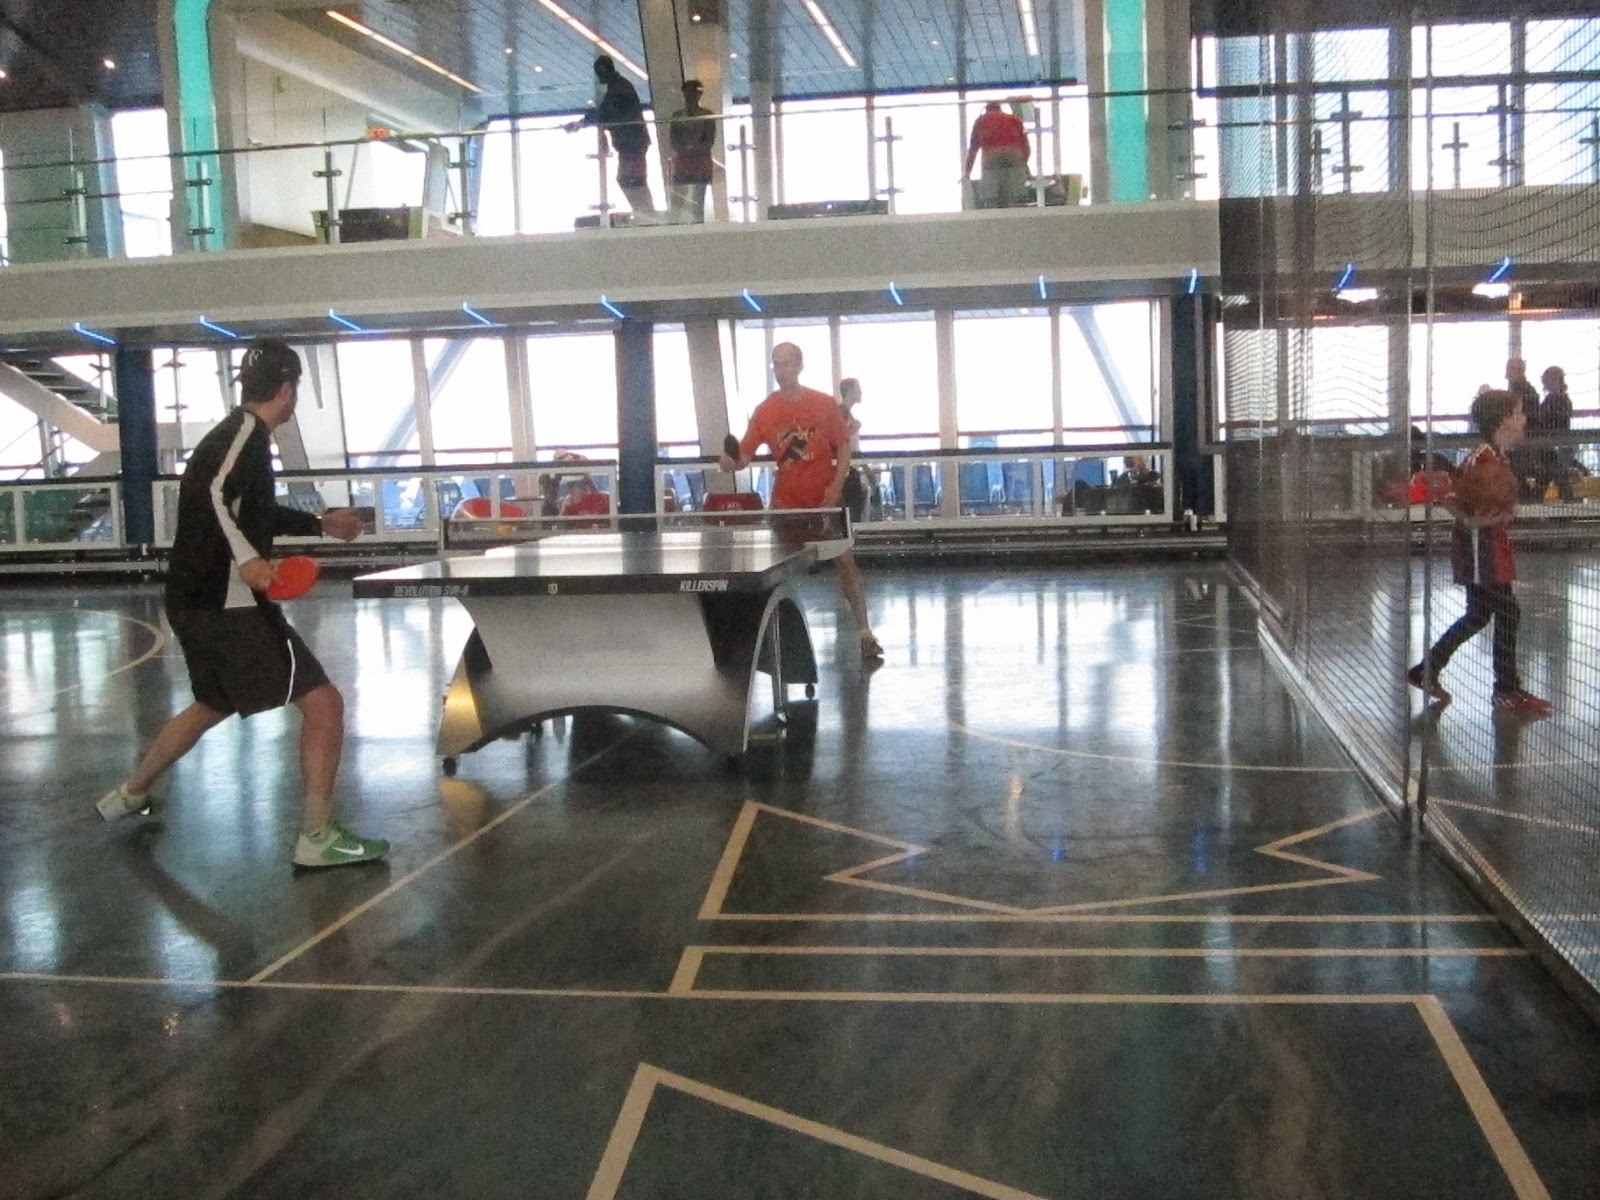
Adam got to play ping pong with the Royal Caribbean Cruises Ltd. CEO (the parent company of six cruise lines), and also named Adam.  They bonded.  Such a cool experience.  

The Quantum of the Seas is an amazing ship.  Even though the weather was pretty cold two of the three days there were tons of indoor activities and indoor pools.  The SeaPlex with bumper cars, roller skating, trapeze, ping pong, air hockey, basketball and more really made this ship unique from other cruises we've taken.

The one thing we weren't crazy about was the dynamic dining.  One of our favorite parts of cruising is the standard main dining room experience where you get to know your server and make life-long friends with the table-mates.

Shariously recommend the Quantum for your next cruise!


*This post is not sponsored by Royal Caribbean or anyone else other than me.

Quinoa and Oat Granola, nut free (Recipe Monday)

Monday, December 15, 2014

Inspired by a friend's facebook post about finding a nut free/fruit free granola or granola recipe and my own disappointment with lack of nut free granolas (not allergic, just not a fan) on the market I tackled making my own.  This recipe is for a basic granola.  Then you can add what you like.   It's not very sweet, so if you want sweeter, add some brown sugar to the mix.  If you like nuts, go ahead and add them.

Ingredients:

1 1/2 cup Rolled Oats
1/2 cup Quinoa
1/2 cup Steel-cut oats
2 tbsp Vegetable Oil
1/4 cup Honey (warmed to make more liquidy and easy to coat)
1 tsp Vanilla
1 tbsp Cinnamon
1/4 cup dried fruit and/or nuts
Pinch of Salt

Recipe:

1.  Preheat oven to 300 degrees.
2.  Rinse quinoa to remove bitter taste.
     
3.  Put rolled oats, steel-cut oats and quinoa in a bowl.  Mix in warm honey, oil, vanilla and cinnamon until dry ingredients are coated.

4.  Place on baking sheet and bake for 30-45 minutes until browned stirring every 15 minutes.
5.  For the last 5 minutes, you can add in raisins, dried cranberries if you like.  Doing so will make them first "puff" up then in the long run make them chewy.

7.  Serve however you like to eat your granola!  I have mine with some plain or vanilla greek yogurt.


This makes for a Shariously delicious and healthy breakfast!  What would you add to this granola recipe?

Five Foto Friday (November 14, 2014)

Friday, November 14, 2014

We bought a house! We've been in the house for about a month (hence the lack of posts) and been slowly decorating and buying things.  Here are five fotos of some of the projects we've completed. Pardon any disorganization or boring photos.

One of the first things we needed was a shower curtain (for obvious reasons).  Check out how perfectly this curtain we found matches!


Our move went very smoothly, except for one thing, the box spring for our mattress did not fit up the stairs.  Apparently this is a common problem.  So for a few weeks we had our mattress on the floor and then finally got a temporary bed frame and headboard from Ikea.  Temporary, because we plan to redo the master bedroom and hopefully get a king size bed.


The first few weeks we had our TV on a table, but we finally got this TV stand delivered, in pieces.  Three hours later, our TV has a home with storage and it fits perfectly with our decor.


We had a tiny apartment size desk, so we purchased a desk, which although is in a different room as the TV, is the same brand and style.  The desk looks great in our office, we just need a chair to complete the room (for now).  Both are from Wayfair, my new favorite decorating site.


When we moved in, the outside lights were old and rusty, so we put up two of these beauties from Home Depot.


We are not quite fully organized yet, but stay tuned for more to come!

Roasted Cauliflower Soup (Recipe Monday)

Monday, November 10, 2014

After buying 3 pounds of cauliflower at Costco, I decided to make some soup out of (most of) it.  I completely made this recipe up based on what I had in my fridge.

Ingredients:

2 lbs Cauliflower - cut
2 Peppers - chopped
1 Onion - chopped
3 Carrots - chopped
1 Cup peas
3 Cloves Garlic - minced
3 Cups Broth

Recipe:

  1. Preheat Oven to 425 degrees.
  2. Place cauliflower on baking sheet and spritz with olive oil (you know I use my Misto).  Sprinkle with salt.  Use sparingly, especially if your broth is salty.  Bake for 20-30 Minutes.
  3. Place peppers, 1/2 onion, carrots and peas on separate baking sheet.  Repeat spritz of olive oil and light salting. Bake 30 minutes.
  4. Place broth in pot and bring to boil.  Reduce to simmer, and put cauliflower, garlic and other half of onion in pot.  Simmer for 20 minutes until onions are soft. 
  5. Using an immersion blender, blend mixture well until smooth.
  6. Toss in other tray of roasted peppers, onions,  carrots and peas.  Let pot simmer for 30 minutes.
  7. Served best with sourdough bread or in a bread bowl!
Are you always looking for a good soup to put in bread bowls?  I know that it's hard to find a thick soup that won't soak the bowl immediately.  This soup is perfect for a bread bowl.  First, it comes out with a great consistency as to not soak completely into the bread and second it's so low-cal that you don't feel as guilty eating so much bread.

Sorry I forgot to take a picture of the final product.

A Shariously healthy soup!

Five Foto Friday (September 19, 2014)

Friday, September 19, 2014

For the past eight years I have been a mentor in the ACE Mentor program.  The program is an weekly after school activity that exposes high school students to the Architecture, Construction and Engineering industry. Every September my Company buys a ticket for me to attend the kickoff cocktail party fundraiser. The event is held in a newly constructed building or space. Past years have been at John Jay College's newest building, the Hearst Tower, The New York Times building and Lincoln Center. This year’s event topped them all, literally.  It was held on the 68th Floor of 4 World Trade Center. Although the building is not occupied yet, the building is mostly done except for interior fit outs. Needless to say, on a beautiful September night, I have many more than five photos to share with you.

When I walked out of the elevators, I was looking at the southern view.  Every corner I turned the view got better and better. 

The floor was completely open, just the core and expansive views for 360 degrees.  First up, a view of the Freedom Tower 1WTC.  Have been seeing 1WTC go up for years, but it's a whole different perspective when you look at it from the middle of it's height.


Next, is a panorama view looking northwest.


 This view is me standing near the core of the building, looking southwest.  One of the best parts of this building, from an engineering standpoint is that there are no columns at the corners, so they provide very expansive views.  You can see one large column at the right of the picture.  Basically, each corner of the building is cantilevered on columns at the faces.  Bottom line - Great Views with minimal obstructions!


 Sunset on the left, 9/11 Memorial on the right.


 Night time view looking north.


Here I took essentially the same picture before and after sunset of the Brooklyn and Manhattan Bridges.


A Shariously great event!  Maybe next year in 1WTC?